
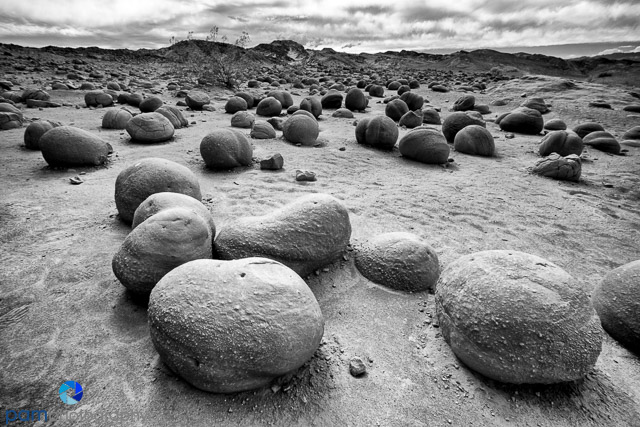

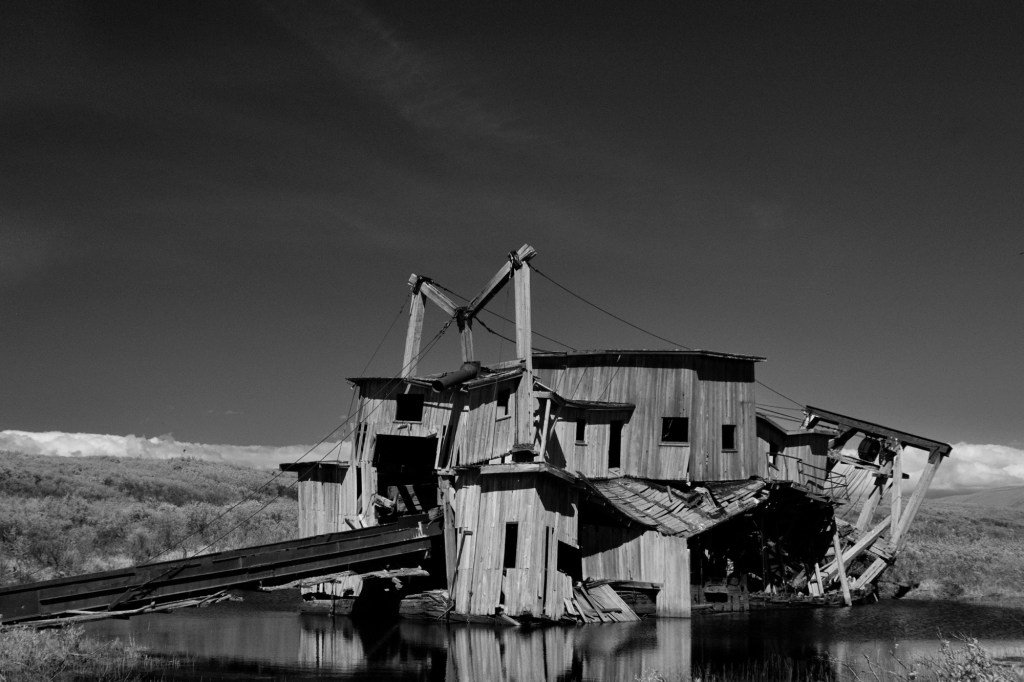
When I first decided I wanted to be a better nature photographer, I started looking at all of the images of the world’s best and famous photographers. One kind of photo that always appealed to me (and many other people) is the near-far wide angle view popularized by David Muench. Here is how I try to get that look.

You can do this with a point and shoot, but it is best done with a wide angle lens on a DSLR. Because the composition can be tricky, as well as the depth of field, I always use a tripod, even in pretty bright light. I do not need the tripod for the shutter speed. I need it for a precise composition.

After finding the near-far subjects, I will hand hold my camera and move around into every conceivable distance and height behind the near subject. If you have not heard this before, your legs are the most mobile tripod you have, so use them first. Once I find a composition I like, I put my tripod down and position it. Invariably the tripod is pretty low to the ground and very close to the near subject. Newer cameras with a flip up screen are very helpful here.

On my Canon 5D full size sensor, I was using focal lengths mostly between 16 mm – 24 mm. On my Fujifilm X-T2, I have a 10-24 mm lens on the APS-C sensor.
The challenge is to get everything in the frame sharp from front to back. Trial and error, as well as knowing the hyper-focal length of your lens helps. A good rule of thumb is to focus 1/3 of the way into your image.

Finally, many people are now focus stacking these types of photos, but I honestly am too lazy to do this up to now. After taking several images with different focus spots, one can combine the photos in Photoshop and get a sharp image from front to back. This is more necessary if you are using a telephoto lens. I think a good camera with a good wide-angle lens properly focused and at f/16 should yield a sharp photo from front to back.

A true near-far photo has two strong competing subjects that also compliment each other. Most photos will be better with some kind of foreground element, but this does not make it a near-far composition. Foreground elements are meant to draw you into the main subject or be a compliment. They will not compete with the main subject.

A final note on processing, check your edges for diffraction or softening around the edges when using f/16. I usually deal with this with a bit of sharpening and by giving the photo a vignette.
To see more of (and buy) our photographs, please go to www.pamphotography.com


Leave a comment