
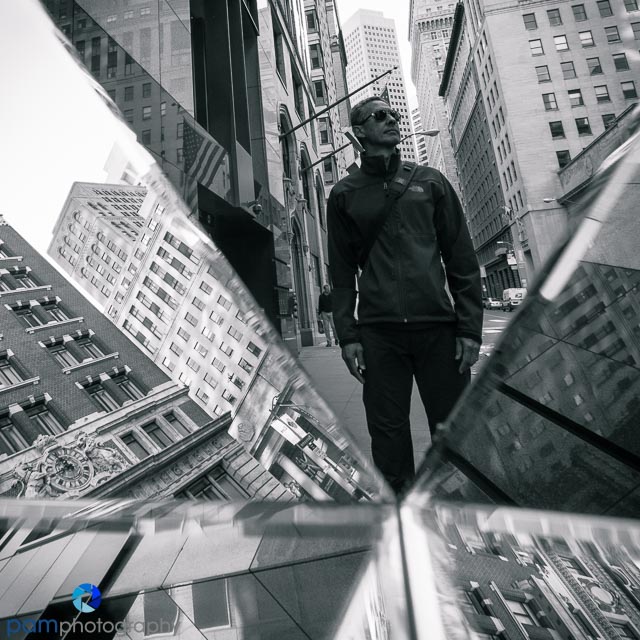

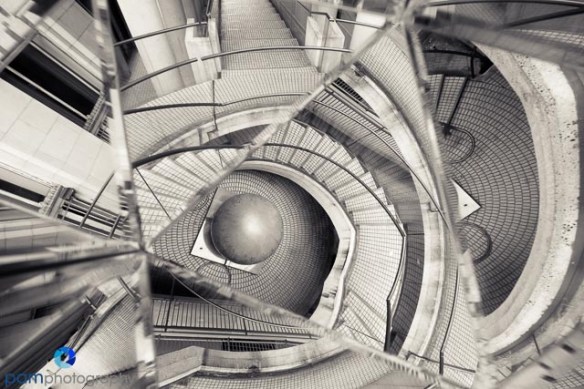
I was recently inspired by a Lindsey Adler image, It was a geometrical abstract portrait she shot on a rooftop in New York City. Never someone to pass up the opportunity for a project that requires my favorite handy man’s help, I set out to explore this technique with my own interpretation.
The images in this post are from a city walk in San Francisco. Yes, I walked around for 6 hours with this football-sized prisim in my hand getting stopped by perplexed pedestrians wanting to see what I was up to. If you’d like to try, here are some tips to get you started:
- Using duct tape, tape together 3 square mirror approximately 6×6 inches into a triangle shape. I think it would be better if you can find mirrors without a beveled edge. I was not successful. The ones I found at my local craft store had a bevel, and a very tenacious sticker right in the middle that took me 1 hour to remove with solvent.

- Use a wide angle lens. I found that 10-16mm on my XT2 was about right. At the 10mm range you will get distinct multiple triangles. At the 16 mm range you will get a strong focus on the center subject with narrow “fringe” images.
- Have a strong subject in the center.
- Tilt and rotate the prism to make sure you are maximizing interest in every section. I found photographing with blue sky or street made boring images.
Overall, remember you are framing several images at the same time. This is the hard part. I spent most of the day with the pointy part of the triangle facing down. I found that when I processed the images it was a severe line at the bottom of my frame. I wished I would have tried more with the flat side parallel with the camera.

As if I didn’t have enough, I took my prism to Las Vegas a few weeks later. I’ll post those images in a follow-up post.


Leave a comment