


In our last post, Mary wrote about the fun and thrill of “finding” panoramic compositions in what we see. Here is a quick primer in making panoramas. See how.

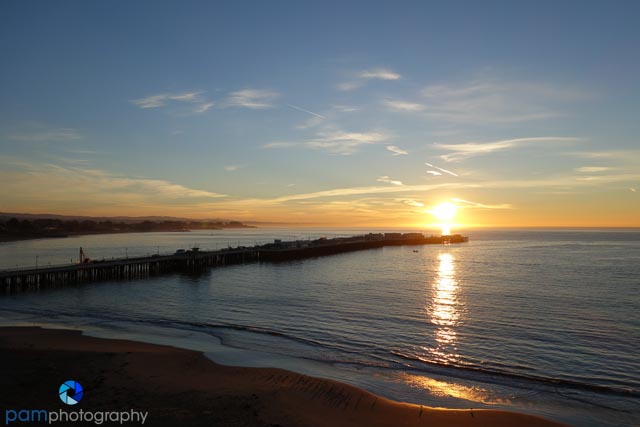
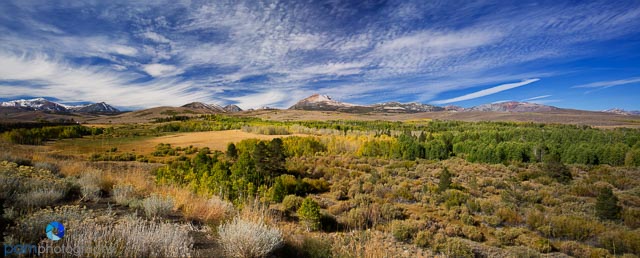
Many point and shoot cameras now have a panoramic setting that takes advantage of the camera’s capacity to shoot video. This is essentially a very short video. The above photo was taken with my Sony RX 100 MK II. This is a great feature to have in a pinch. A few downsides: sometimes it takes many tries as you have to move the camera at a perfect pitch; can only make a pano in landscape orientation so they always come out short and skinny (essentially 16:9 ratio), and you might get a bit of distortion or curving around the edges.
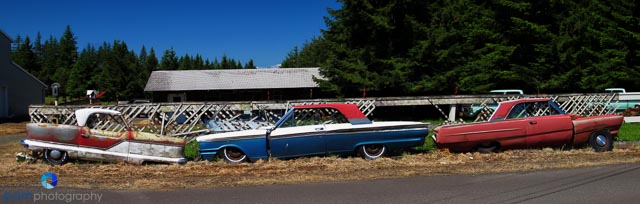
I made this photo with my Canon G12 which has a pano assist feature. It helps you compose several single shots and shows you the overlap. However, you must stitch them together later in PhotoShop. The photo comes out better, but you have to wait.
Of course, the easiest way to make a pano is to simply crop a 3:2 or 4:3 single shot. I have a whole blog to quickly explain this.
If you are using a cell phone, I highly recommend Snapseed. It is our favorite phone processing software. It has a crop tool to easily make your cell phone photos into panoramas.
Those are the easy ways. Now, if you really want to make big stunning panos with lots of detail, you are going to need the right equipment and right technique, along with processing software.
You can put your camera on a tripod and pan or you can try to stand and hand-hold and pan (very difficult).

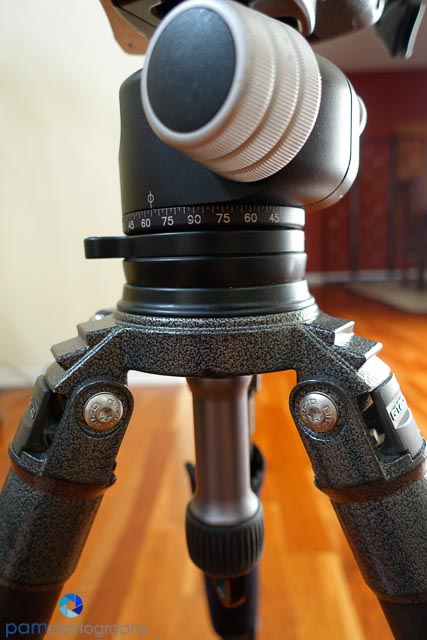
I have my Canon 5D Mark III in portrait orientation attached to a Really Right Stuff nodal bar, attached to a panning clamp, attached to a BH 55 ball head on Gitzo legs. I have made panos without the nodal bar and you get really bad distortion with a compact skinny center and wide funnel-like ends. This happens when the axis of the lens opening is not over the center point of the tripod, That is why a nodal bar is essential. If you have a bigger lens with a lens collar, usually you do not need a nodal bar.
One common problem with making panos is the final photo comes out quite crooked because the base of the tripod is not level. Even if you think your camera is level, your base may not be. You can fuss with the legs to get the base level or you can get a base leveler.
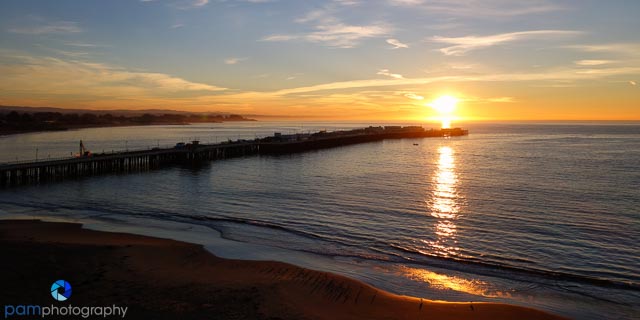
In this set-up you can do 3-7 shot panos.
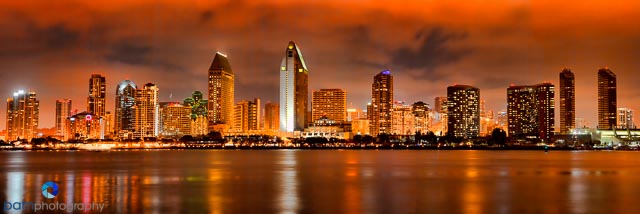
Notice all the buildings stand pretty straight from edge to edge, This is an indication that I got the camera lens over its nodal point, the base was level, and the stitched photo has no distortion.
My new favorite way to make a pano is using my Canon 24 mm tilt shift lens. No need for a base leveler or nodal bar. You just shift the lens and the camera position and make two photos that seamlessly stitch together when processed.

Finally, all of these images really have to be processed in software to stitch them together. Mary and I use Lightroom to manage and edit our photos. Once in Lightroom, you highlight the images and merge to Panorama in Photoshop. There are lots of tutorials of how to do this on the WEB.
A few last hints and suggestions. Mary and I always use bubble levels in our camera hot shoes for all of our photo making. When I have the pano set up, I have no less than 4 levels going. Having a level base and level camera is essential.
I like the Really Right Stuff Panning Clamp, but it is not essential.
I also like to make the pano images around 100 mm. Wide angle lenses are great for one shot landscapes, but can become distorted as the wide-angle gets exaggerated in a stitched together pano. Besides the setup above, I often use my Canon 70-200 mm set at 100 mm to make my panos.
To see more of (and buy) our images, please go to www.pamphotography.com.


Leave a comment