
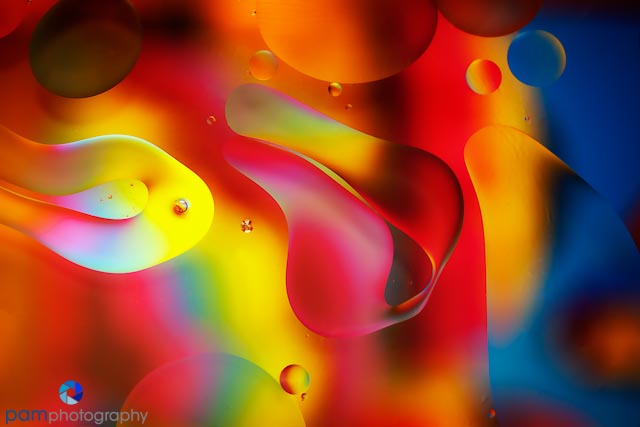

Well, I am disappointed to have to admit it, but it looks like another wildflower bust in Southern California this year. In fact, our weather swings from cold rainy days, to muted sunny skies and 85 degrees. This past weekend, I decided to stop pleading with mother nature to just cooperate, and moved my photography project indoors. I tried a project that I had done in the past; creating abstracts by shooting through oil droplets that are floating on water. It took me two days to finally get a combination that I liked, so I thought I would share my tips, trials, and tribulations.
Step 1: Get the proper equipment
While my specific suggestions aren’t necessary, they do make things easier.

- Glass baking dish without writing through the middle. Pyrex is the most popular dish on the market – but it has Pyrex written right through the middle. I finally found one at Ikea.
- Two stools of the same height. I used short plant stands that I purchased from Cost Plus years ago. Home Depot paint buckets turned upside down would probably work well too.
- A sheet of glass to span across the two stools. The first time I tried this I balanced my baking dish between the stools, it was precarious and didn’t give me much room to work. I went to a glass shop down the street and had one cut to size.
- Cooking oil. Good old Wesson does the trick, no sense in using your expensive olive oil.
- Desk lamp. I have found using one with a gooseneck arm makes adjusting the light easier.
- Tripod that allows you to shoot straight down.
- Cable release
- Macro lens
- Colorful backgrounds. This seemed to be the hardest part for me. I cut colorful pages out of magazines (decorating magazines had the best options) and used colorful gift wrap. The gift wrap was easier for me to work with because I could cut long pieces. Make sure to look for some that has minimal white in the design. The photo at the top of the post was made using a photo I took at the Balloon Fiesta as a background.

Step 2: Get started
To be honest, I hate the set up part of this project, it seems to take forever. The hardest part for me this time around was the oil and water. It seemed like no matter what I tried, the oil droplets would just gather together into a big blob. Frustrated I left it to sit over night, but then the bottom of the dish was covered in air bubbles which I didn’t want to have to clean up in post-production later. I got the best results, when I cleaned the dish, filled it with water, added a little oil and then left it to sit for a few hours. I’m guessing that having the oil and water come to room temperature helped the droplets to stay independent. It’s important to gently move the droplets with your finger to get them into position. Don’t take any of your frustrations out by swirling vigorously or you will end up with tons of million droplets and air bubbles that you’ll have to clean up later.
I experimented with aperture. Depending on the design and detail of the background, I either left the lens wide open, or took it down usually to f8. Sometimes even f22 if I wanted to bring in more detail. It was important to have the desk light on so I could get a faster shutter speed and stop moving droplets that were floating around on the water.

My next tip is to use Live View AND your bare foot. Odd I know. Looking through Live View allowed me to compose without bending to a flat 90 degrees (which I can no longer do, even in yoga class). I could then adjust the background with my foot by sliding it around on the floor until I had the right combination. Using the depth of preview button also helped. I’m sure I was a sight to see, and am still thankful I did not incur any injuries.
I started by using my 2 second timer, but found the droplets kept moving by the time the shutter released. Using the cable release allowed me to capture what I was seeing through Live View.
Step 3: Processing
I took over 200 frames in two days. Once I had the formula right, things seemed to work. One caution about editing out the ones you don’t want – after the first 50 frames you start seeing things in the oil blobs, it’s almost like a Rosarch test.
For processing, I did the following:
- Cleaned up the small bubbles where they didn’t add visually. I also like using Topaz Clean or Simplify when there are a lot of bubbles.
- I accentuated the colors using Nik’s Viveza

Step 4: Clean up
You’ll notice in my set up picture I have droplets of water all around my baking dish. Just a reminder – this is oil and water which makes the clean up a bit more challenging. I’m just thankful Peter is patience and hasn’t insisted I move this little operation out to the garage…..yet.
For more information about these photos visit pamphotography.com


Leave a comment