

It seems like every week I discover a new technique to use with my infrared images. Lately I have been exploring the realm of possibilities with accentuating the color that my infrared camera is capturing. I thought I would consolidate what I have picked up so far, and will continue to add needed.
Color Infrared Filter
To take advantage of what I outline below, you will need to make sure your camera has a color infrared filter. This allows the sensor to pick up infrared light, and some of the color of the visible light spectrum. The Canon Rebel I used for these images has a Lifepixel Super Color Filter.
Tip 1: Set your custom white balance before you shoot
Typically you set the white balance using something that is gray, green, or white in the same light as your subject. On Lifepixel’s site they have different recommendations for different filters. I believe gray is the recommended color for my filter. However, lately I have been experimenting with green and white, and find I can get slight color variations.
Tip 2: Create a custom DNG profile
This is my latest discovery. I initially started working with DNG profiles, so that I could bring my infrared images directly into Lightroom, without processing them in Canon’s Digital Photo Professional first. This was to avoid Adobe’s incorrect color temperature reading which made the image red. To learn more read my Workflow for Processing Infrared Photographs post.
I created a straightforward profile, and then a second one that introduced the peach hues you see in some of my photographs. I feel there are more possibilities here, and will continue to make custom recipes to achieve different color profiles. Tuts+ has a great post with step-by-step instructions on how to work with the profile editor.
Tip 3: Introduce blue skies and colored foliage using the Channel Mixer
This involves swapping the blue and red channels. Deb Sandidge has easy instructions for creating a Channel Mixer Blue Sky Preset. This will usually give me a blue sky, and change the color of my foliage to pink or yellow. I then create a Hue/Saturation layer and tweak the colors (or change them entirely).
The image below looked more like film negative when I first brought it in. Using the Channel Mixer I was able to bring in the blue water and sky, and the red TV.

Tip 4: Add a black and white layer and reduce the opacity
For this technique, I start with the Channel Mixer tip, and then will process the image with Nik Silver Effects Pro 2. Back in Photoshop, I will reduce the opacity to bring in some of the color of the underlying layer; or I will add a layer mask and brush the color back into specific areas.
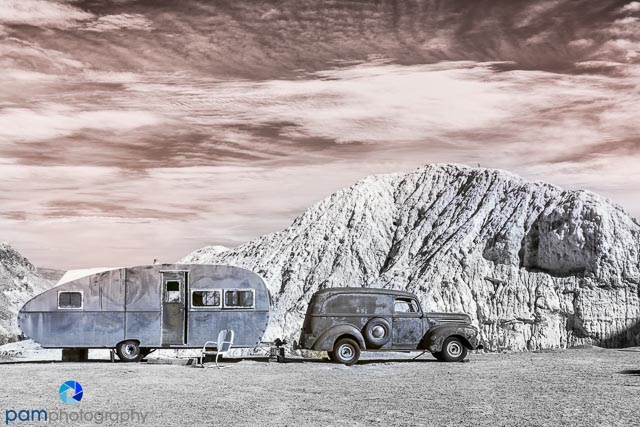
Tip 5: Use a bleach bypass technique to accentuate the color
Bleach Bypass typically involves de-saturating the image. I like to use this technique to create an almost black and white color combination which highlights the color in certain parts of the image. In the image below, I changed the yellow color to red, and then used Bleach Bypass in Nik’s Color Effects Pro to create the stark surroundings. It becomes more sinister when you realize there is a knife thrust into the middle of the chair and a pair of pants draped across the seat.


Leave a comment