

High Dynamic Range (HDR) photography may be the best and most useful new technology we have seen in years and also the most controversial. HDR refers to the ability to combine multiple photos with different exposures that capture a larger range of light than is possible with a single exposure. For someone who is a hardcore traditionalist, using HDR might seem like cheating. After all, we already use hardware to change exposures with graduated neutral density filters, and other circular filters, like the 8-stop one from Singh Ray. However, used well in the right situations, HDR gives you a powerful tool to make a photo that more accurately captures what our eyes can see. Here is how to do it.
The Situation
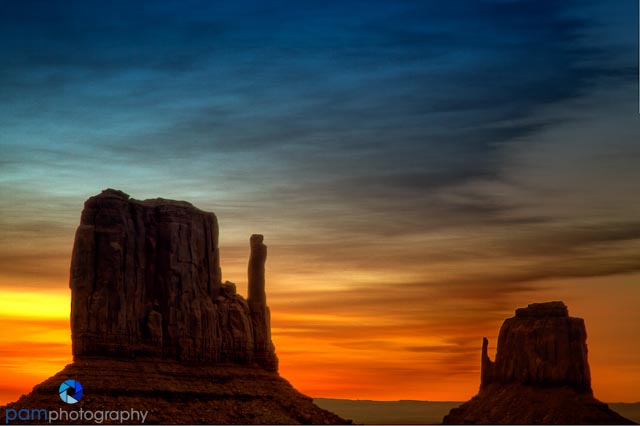
You will want to make an HDR photo when you want to capture more detail in shadows than you typically can do with a single exposure photo. This often times happens during sunrise and sunset when you are shooting into the sun. It also happens when you have a wide range of light because of deep shadows created by mountainous terrain. Lastly, it is ideal for in-door situations, like shooting inside the California Missions. Without HDR, the “white sand” in the foreground below would have been nearly black.

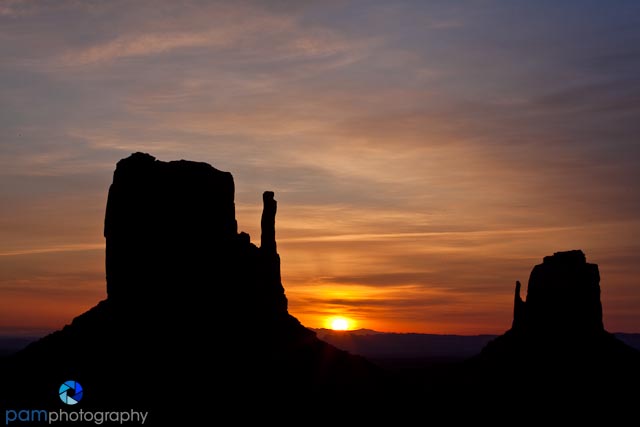
The two Mittens photos in this blog show the dramatic difference. In the photo below, all of the detail from the face of the Mittens is lost in the deep black shadow. The cover photo reveals what is underneath those shadows while preserving the beautiful sunrise sky.

I often times use HDR inside the California missions. It is always dark and the good news is the furniture does not move. HDR reveals the interior colors much better than a single shot would, even with a long exposure.
Equipment
In order to make an HDR photo, you will need to have the ability to take multiple exposures with the exact same composition in a relatively short period of time – hand-holding is out of the question. With a DSLR, you can do this in Aperture Priority and use exposure compensation. I prefer to use Manual Mode and change exposure by adjusting the shutter speed. Both do the same thing.

You also need a tripod (see our tripod blog) to keep the camera steady so that each composition is the same and for longer exposures so that you do not have blurred or out of focus images. Using HDR above, I was able to show the details in the Pavillion that would have been lost in dark shadows with the sun setting behind it.
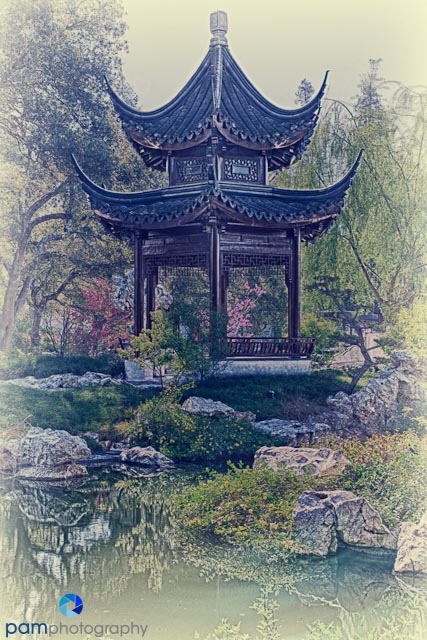
Mary made this artistic interpretation from the Chinese Garden at the Huntington. HDR was necessary as she was shooting directly into the sun and the details in the Pogoda were washed out. With a 5-shot HDR she was able to bring back all of the details.
Also, some cameras have the capability to take HDR images, without any post-processing. My Canon G12 point and shoot takes a three shot HDR and combines the images in-camera to create a final HDR photo. The new Canon 5D Mark III also has this feature in a full size DSLR. When I made the photo below, I was under a tree and the grass in the foreground was in a dark shadow that you can still see. Without the HDR, the foreground would have been almost black.

Execution
So, you look out at the scene and because of the light and shadows, you decide this is an ideal situation for an HDR image. Compose and make a photo with the in-camera exposure metering. Check the image and see what you think. If you have too much shadowing, or do not have enough detail, then you should start your multiple exposures. At minimum, you should take two more images, one at +1 stop and -1 stop. I usually also add +2 and -2. Therefore, I will end up with a 5 shot HDR with a full 2 stops on either side. I recommend 5-9 shots depending on the range of light you are working with. I have never really seen the benefit of 11 stops and even at 9, it seems a bit much. The sweet spot for me seems to be 5-7 stops. If you have a histogram, know how to read it. You will want the series of photos to cover the full range of the histogram from black to white.
In the photo below, without HDR, you would not be able to see the intricate rock work in the wall supporting the Lone Cypress.

Software
You will need software to combine and adjust the multiple images you just made. We use Nik HDR Effects Pro. You highlight the 5-7 images you made and then open them up in Nik HDR. Nik will automatically combine and align the images and then offer you up to 33 preset adjustments as suggestion for the final image. I find one I like and then I make final adjustments in Photoshop and Nik Viveza. The photo below was shot in the middle of the day. I loved the clouds, but they were quite bright. By using HDR, I was able to get the clouds AND the details in the mountains which looked flat and black without HDR.
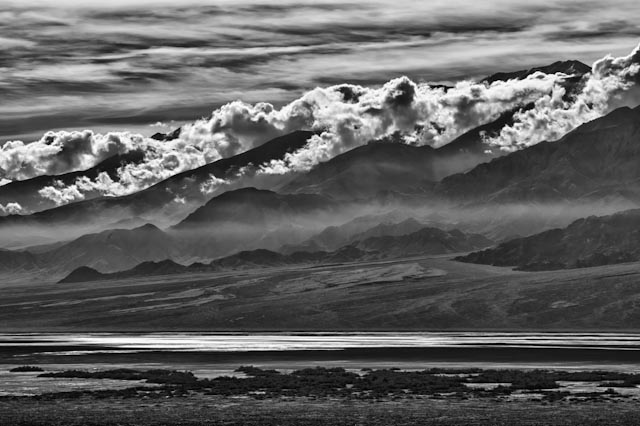
Below is the best single exposure I could get, so I turned to HDR. Notice how much more detail I got in the HDR photo above.

WARNING
There are several things you have to watch out for. First, if it is windy and you have moving objects – usually water or clouds, this will look strange in the HDR image. At best, it will throw a small shadow (called ghosting) and, at worst; it will be terribly blurry and unusable. Second, make sure you have some noise reduction software (we use Nik’s Define). The combined photos will generate a lot more noise than a single exposure. You also should think about sharpening the photo, as any micro movement will create a bit of fuzziness. Lastly, HDR photos can look “over-cooked” or “over-done” or whatever you want to call it. The colors are too bright and contrast too high. When this is done, it is obvious that it is an HDR photo and appears “fake” and not reflective of reality or what the photographer “saw”. Other times, they look flat and without depth because there are no shadows or black points.
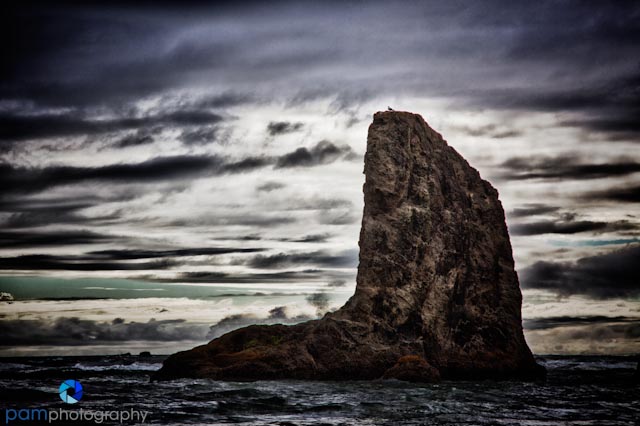
I love this photo below, but I have to say this is not what it looked like when we were in Oregon. I have significantly increased the exposure on the rock and sky and jacked up the contrast to make this photo. It is more composite art, than a realistic photograph. I was able to create something very moody. In fact, the water was not that choppy, but combining multiple exposures created the “angry sea.”
HDR is a valuable tool in certain situations. When done well, you will be able to capture details and light that you could never have done with a single exposure. The best part is that it more accurately reflects what you might have seen, but that your camera’s sensor has a hard time capturing. It also enables a greater range of creativity. Lastly, from an ethical point of view, I always label my HDR composites as such, so as not to pass off a composite as a single exposure photo. I think this only fair and accurate. To see more of our photographs, please go to www.pamphotography.com.

Leave a comment